
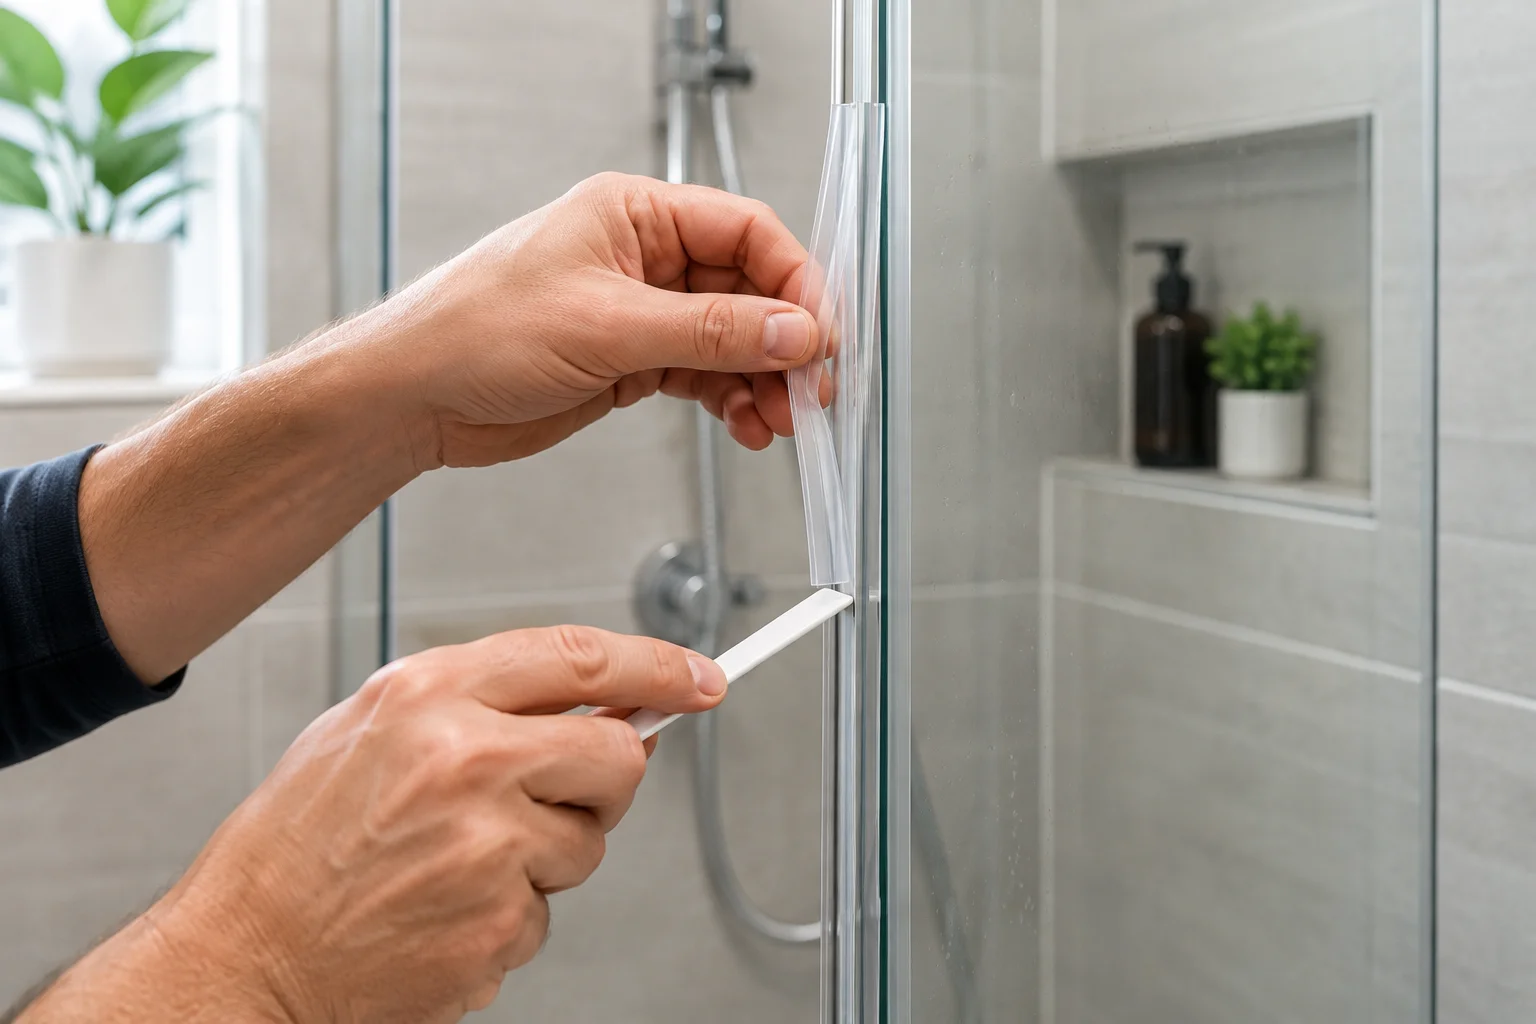
To remove glass shower plastic trim, first identify whether the trim slides off, clips onto the glass, or is fixed with silicone. Carefully loosen the trim from one end and pull or slide it away without putting pressure on the glass. If silicone is holding it in place, gently cut the sealant with a plastic scraper or suitable blade before removing the trim.
Removing plastic trim from a glass shower door may seem like a small DIY job, but it requires care. Shower glass can be vulnerable to chips and cracks, particularly around exposed edges, so forcing an old seal or trim off the door can cause unnecessary damage.
Plastic shower trim is commonly used along the bottom or sides of frameless and semi-frameless shower doors. Over time, it can become cloudy, stained, brittle, mouldy, or loose. Knowing how to remove it properly makes replacement much easier and helps protect the shower glass.
What Is the Plastic Trim on a Glass Shower Door?
The plastic trim fitted to shower glass is usually a clear or translucent seal designed to control water.
Depending on the shower enclosure, it may be called a:
- Shower door seal
- Shower glass seal
- Plastic shower trim
- Shower door sweep
- Bottom shower door seal
- Shower screen seal
- Glass shower door gasket
- Drip rail
- Shower door weather strip
- Frameless shower door seal
Although these products perform similar jobs, their design and removal method can vary.
Some simply push onto the edge of the glass. Others slide along the bottom of the shower door, while certain installations may include silicone or adhesive to keep the trim securely positioned.
Why Would You Need to Remove Shower Door Plastic Trim?
You may need to remove the trim even when the shower door itself is still in excellent condition.
The Plastic Has Become Discoloured
Clear shower seals can gradually develop yellow, brown, or cloudy staining.
Soap residue, hard water minerals, cleaning products, moisture, and everyday use can all affect their appearance.
Cleaning may help with light staining, but heavily discoloured plastic often looks better when replaced.
Mould Has Developed Around the Seal
Constant exposure to moisture makes the lower edges of shower doors a common location for mould and mildew.
If mould has worked its way inside or underneath an old seal, removing the trim allows the area to be cleaned more thoroughly.
The Shower Door Is Leaking
The bottom seal helps direct water back into the shower enclosure.
When the seal becomes cracked, damaged, loose, or distorted, water may escape underneath the door and collect on the bathroom floor.
Replacing a damaged glass shower door bottom seal can often solve minor water leakage problems.
The Trim Is Cracked or Brittle
Plastic becomes less flexible as it ages.
An old seal may start cracking when you touch or bend it. Once this happens, replacement is usually more practical than attempting to reuse the existing trim.
Tools You May Need
Removing shower glass plastic trim usually requires only a few basic items.
You may need:
- Protective gloves
- Microfibre cloth
- Plastic scraper
- Utility knife or razor scraper
- Mild bathroom cleaner
- Warm soapy water
- Silicone remover
- Replacement shower door seal
- Measuring tape
Avoid using heavy metal tools directly against the exposed glass edge whenever possible.
The goal is to remove the plastic rather than pry against the glass.
How to Remove Glass Shower Plastic Trim Step by Step
The exact technique depends on how the existing trim has been installed.
Step 1: Inspect the Existing Shower Trim
Before pulling anything, inspect the full length of the seal.
Check whether it:
- Pushes directly onto the glass
- Slides onto the bottom edge
- Contains clips
- Has visible silicone
- Appears glued in position
Also inspect the glass for existing chips or cracks.
If the door is already damaged, forcing the trim could make the problem worse.
Step 2: Clean and Dry the Area
Soap residue can make the plastic slippery and difficult to grip.
Clean the trim and surrounding glass with mild soapy water and dry everything thoroughly.
This also gives you a clearer view of how the shower seal is attached.
Step 3: Start at One End of the Trim
For a push-on shower seal, begin at one corner.
Grip the plastic firmly and gently pull it away from the glass.
You may need to wiggle it slightly from side to side to loosen the grip.
Avoid suddenly yanking the seal downward. Slow and controlled movement reduces unnecessary stress on the glass.
Step 4: Slide the Trim if Necessary
Some frameless shower door seals are designed to slide along the edge rather than pull directly away from it.
Try moving the trim horizontally.
If it begins sliding, continue supporting the door while gradually removing the seal.
If it does not move easily, do not force it. Check for silicone, adhesive, clips, or accumulated dirt that may be holding the trim in position.
Step 5: Carefully Remove Silicone
If the shower trim has been sealed with silicone, the silicone needs to be separated before the plastic can come away.
Carefully cut along the silicone line.
Keep the blade directed away from your hands and avoid scraping aggressively against the glass edge.
A plastic scraper can then be used to loosen remaining sealant.
Take your time here. Silicone can hold surprisingly well even after the visible section has been cut.
Step 6: Remove the Plastic Trim
Once the seal is loose, gently pull or slide it completely away from the glass.
If the plastic begins breaking into pieces, remove each section individually instead of trying to pull the remaining trim off in one movement.
Old plastic often becomes brittle, so this is not unusual.
How to Remove a Shower Door Bottom Seal
The bottom seal is one of the most commonly replaced pieces of shower trim.
Open the shower door fully so you have enough room to work.
Starting at one end, try sliding the seal horizontally along the bottom edge of the glass.
If the seal is a push-fit design, carefully pull it downward while supporting the glass door.
Do not put excessive sideways pressure on the door.
Once removed, inspect the bottom edge for:
- Limescale
- Soap deposits
- Old silicone
- Mould
- Chips in the glass
Clean and dry the area before installing the replacement seal.
How to Remove Old Silicone From Shower Glass
Sometimes removing the plastic trim is only half the job.
Old silicone may remain attached to the glass.
Use a suitable scraper to carefully lift the bulk of the silicone from the surface. A silicone-removal product may help soften stubborn residue.
After removing the residue, clean the glass according to the instructions for the replacement seal or sealant you intend to use.
The surface should usually be clean and completely dry before new trim is installed.
Can You Remove Shower Trim Without Taking the Door Off?
In many cases, yes.
Push-fit bottom sweeps and side seals are often designed to be removed while the glass shower door remains installed.
Removing the entire shower door can make a relatively simple job significantly more complicated.
However, access can vary between shower designs.
If the door is extremely heavy, awkwardly positioned, damaged, or connected to specialist hardware, professional assistance may be the safer choice.
How Do You Find the Correct Replacement Shower Door Seal?
Do not assume all clear shower door seals are interchangeable.
Before buying a replacement, check three important measurements.
Glass Thickness
Measure the thickness of the shower glass.
Replacement seals are manufactured to grip specific glass thicknesses, so an incorrectly sized seal may be too loose or impossible to install.
Length of the Existing Seal
Measure the full length required along the glass.
Some replacement seals are supplied in longer sections that can be cut to size.
Shape of the Seal
Look at the profile of your existing trim.
Shower door seals may include:
- Straight fins
- Curved fins
- Bulb seals
- Magnetic seals
- Drip rails
- Double fins
- Angled water deflectors
Matching the profile is important because the seal needs to direct water correctly, not simply fit the glass.
How to Install New Plastic Trim on Shower Glass
Once the old trim has been removed and the glass cleaned, installation is usually straightforward.
First, compare the replacement against the old seal and confirm the length.
Cut it carefully if required.
Position the new seal against the appropriate edge of the glass.
For a push-fit design, gently press it into position along the glass edge.
Work gradually from one end to the other rather than attempting to push the whole trim into place simultaneously.
If it is a sliding design, align the channel correctly and slide the seal along the glass.
Avoid hitting the trim with a hammer or forcing an incorrectly sized seal onto the door.
Do You Need Silicone for a Shower Door Seal?
Not always.
Many plastic shower seals are intentionally designed as push-fit components and therefore do not require silicone.
Adding silicone unnecessarily can make future removal more difficult.
However, shower enclosure designs vary. Some fixed profiles, channels, or trim components may require sealant as part of their installation.
Follow the instructions provided with your replacement component whenever possible.
Common Mistakes When Removing Shower Glass Trim
A straightforward job can become expensive if the glass is damaged.
Pulling the Trim Too Hard
If the plastic will not move, something may be securing it.
Check for silicone, adhesive, clips, or mineral deposits instead of increasing force.
Using Metal Tools Against the Glass Edge
Glass edges are more vulnerable than the flat surface.
Avoid using screwdrivers or other hard metal objects to aggressively pry a seal away from the edge.
Buying Replacement Trim Before Measuring
Shower glass comes in different thicknesses, while seals are available in numerous shapes.
Measure first.
Installing a New Seal on Dirty Glass
Limescale, old silicone, or soap residue can prevent the new trim from sitting correctly.
Cleaning the glass before installation gives the replacement seal a much better fit.
Ignoring the Actual Source of a Leak
A worn bottom sweep is not the only reason a shower can leak.
Water may also escape because of:
- Failed silicone joints
- Incorrect shower door alignment
- Damaged seals
- Gaps around hinges
- Poorly positioned water deflectors
- Problems with the shower enclosure installation
If replacing the trim does not stop the leak, the complete shower enclosure should be inspected.
How Often Should Shower Door Seals Be Replaced?
There is no fixed replacement schedule for every shower.
Instead, inspect the seal periodically and replace it when deterioration becomes obvious.
Common signs that replacement is needed include:
- Cracking
- Splitting
- Permanent discolouration
- Loose fitting
- Mould that cannot be removed
- Hardened plastic
- Water leaking underneath the shower door
Regular cleaning can help reduce soap and mineral buildup and keep the seal looking better for longer.
Can You Clean the Shower Trim Instead of Replacing It?
Sometimes.
If the trim is still flexible and properly fitted, cleaning may restore its appearance.
Remove the seal carefully and soak or clean it with a suitable bathroom cleaning solution. Rinse thoroughly and allow it to dry.
However, cleaning will not repair cracked, stretched, warped, or brittle plastic.
When the physical condition of the seal has deteriorated, replacement is usually the better solution.
When Should You Call a Shower Door Professional?
DIY replacement can work well for simple push-on shower seals.
Professional help becomes more sensible when the glass door itself needs adjustment, the enclosure is leaking from several areas, the existing glass is chipped, or you cannot identify the correct replacement component.
Working with frameless shower glass also requires additional care because the exposed edges and specialist fittings are important to the stability and operation of the door.
For homeowners who would rather avoid risking damage to expensive shower glass, M&N Frameless Shower Doors LLC can assist with professional shower door, glass, and related enclosure requirements.
Final Thoughts
Learning how to remove glass shower plastic trim is relatively straightforward when you first identify how the existing seal is attached. Most push-fit or sliding seals can be removed without dismantling the entire shower door, while silicone-secured trim requires additional care.
Work slowly, avoid putting pressure on exposed glass edges, and thoroughly clean the surface before fitting the new seal. Most importantly, measure the glass thickness and match the replacement seal profile correctly.
If the shower continues leaking after the trim has been replaced, the problem may involve the door alignment, silicone joints, hinges, or another part of the shower enclosure. In that situation, having the glass shower professionally inspected can prevent a small water-control problem from turning into a larger repair.


