
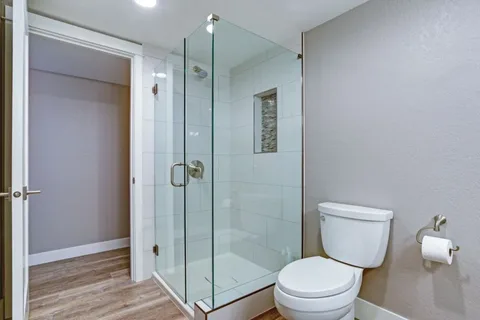
To install shower doors, measure the shower opening accurately, install the wall jambs and tracks, place the glass panels securely, and seal edges with silicone to prevent leaks. Always check alignment for smooth and safe door operation.
Installing shower doors is one of the best ways to improve the appearance and function of a bathroom. Shower doors create a cleaner look, reduce water splashing, and make a shower area feel more modern and organized. Whether you are replacing an old curtain or upgrading to a sleek glass enclosure, learning how to install shower doors can help you complete the project properly and avoid leaks, alignment issues, or costly mistakes.
While shower door installation may seem complicated, it becomes easier when you follow the right steps, use proper tools, and carefully measure the opening. This guide explains how to install shower doors safely and effectively while helping you achieve a clean, durable finish.
Why Install Shower Doors?
Shower doors offer both practical and visual benefits.
Common advantages include:
- Better water control
- Modern bathroom appearance
- Easier cleaning compared to curtains
- Increased durability
- Improved airflow
- Added home value
- Cleaner and more open design
Many homeowners choose shower doors because they create a polished and functional bathroom setup.
Types of Shower Doors Before Installation
Before starting, it is important to understand common shower door styles.
Sliding Shower Doors
Sliding doors move along a track. These work well for wider shower openings.
Hinged Shower Doors
Hinged doors swing outward or inward depending on design.
Frameless Shower Doors
These offer a clean and modern appearance with minimal hardware.
Semi-Frameless Shower Doors
These combine framed support with exposed glass edges.
Pivot Shower Doors
Pivot doors rotate on a hinge system.
Choose a style that fits your shower space and layout.
Tools Needed to Install Shower Doors
Gathering tools first makes installation smoother.
You may need:
- Measuring tape
- Drill
- Screwdriver
- Level
- Pencil
- Silicone sealant
- Rubber mallet
- Safety gloves
- Safety glasses
- Anchors and screws
- Caulking gun
- Soft cloth
Having everything ready prevents delays.
Step 1: Measure the Shower Opening
Accurate measurements are critical.
Measure:
- Width at the top
- Width at the center
- Width at the bottom
- Height of both walls
Walls are not always perfectly straight.
Use the smallest width measurement when selecting a door.
Incorrect measuring is one of the biggest installation mistakes.
Step 2: Check Wall Condition
Inspect walls before drilling.
Make sure surfaces are:
- Strong
- Dry
- Even
- Clean
- Free from cracks
Loose tiles or damaged drywall may affect installation.
Repair issues first.
Step 3: Unpack and Inspect the Shower Door Kit
Before starting, open the package carefully.
Check:
- Glass panels
- Hinges
- Frame pieces
- Tracks
- Screws
- Anchors
- Handles
- Seals
Do not begin if parts are missing or damaged.
Step 4: Mark the Installation Area
Place frame pieces against the wall.
Use a pencil to mark:
- Screw holes
- Track alignment
- Side rails
Use a level to ensure straight placement.
Crooked alignment can cause leaks and poor door movement.
Step 5: Install Wall Jambs
Wall jambs are vertical frame pieces attached to the wall.
Position each jamb.
Use a level.
Mark drill holes.
Drill carefully.
Insert anchors if required.
Secure with screws.
Do not overtighten.
This creates the main support structure.
Step 6: Install the Bottom Track
The bottom track guides the door and helps prevent water leakage.
Cut the track if needed according to manufacturer size.
Place it across the threshold.
Check alignment.
Secure it.
Some systems require silicone instead of screws.
Apply carefully.
Do not block drainage areas.
Step 7: Attach the Top Rail
Install the top rail across the upper section.
This helps maintain structural stability.
Slide or secure it depending on the door design.
Check level alignment again.
An uneven top rail may cause improper movement.
Step 8: Insert Glass Panels
This step requires caution.
Wear gloves.
Carefully lift each glass panel.
Slide or place it into the track or hinge system.
Avoid forcing the glass.
Support weight evenly.
Glass can crack if mishandled.
For heavy panels, a second person is helpful.
Step 9: Secure Rollers or Hinges
Depending on your shower door type:
Sliding Doors
Install rollers and place them onto the track.
Check smooth movement.
Hinged Doors
Attach hinges securely.
Confirm proper swing direction.
Pivot Doors
Secure pivot hardware carefully.
Movement should feel stable.
Step 10: Install Door Handles
Add the handle according to the kit instructions.
Tighten gently.
Do not over-compress glass.
Check stability.
Step 11: Apply Silicone Sealant
Seal gaps to stop leaks.
Apply silicone along:
- Bottom track edges
- Exterior seams
- Frame connections
- Wall joints
Do not overapply.
Smooth sealant for a neat finish.
This step is important for waterproofing.
Step 12: Let Sealant Cure
Do not use the shower immediately.
Most silicone requires curing time.
Common wait time:
24 to 48 hours
Always follow product directions.
Using the shower too early may weaken sealing.
Step 13: Test the Shower Door
After curing, inspect performance.
Check:
- Smooth opening
- Proper closing
- Water leaks
- Door alignment
- Loose hardware
- Track stability
Fix issues early.
Common Shower Door Installation Mistakes
Avoid these errors.
Wrong Measurements
This may cause poor fitting.
Crooked Frame Alignment
Doors may not close correctly.
Weak Wall Anchoring
Can create instability.
Too Much Sealant
May block drainage.
Overtightening Screws
Can crack tiles or damage frames.
Handling Glass Roughly
May lead to breakage.
Careful work reduces risks.
Safety Tips During Installation
Safety matters.
Always:
- Wear gloves
- Use eye protection
- Lift glass carefully
- Keep children away
- Use stable ladders
- Drill slowly
- Avoid rushing
Shower glass is heavy and fragile.
Can You Install Shower Doors Yourself?
Yes, many homeowners install shower doors successfully.
DIY installation works best for:
- Standard-sized showers
- Basic framed systems
- Clear instructions
- Moderate experience
Professional help may be better for:
- Frameless heavy glass doors
- Uneven walls
- Complex enclosures
- Custom-cut glass
How Long Does Shower Door Installation Take?
Typical times:
Basic Framed Door
2–4 hours
Sliding Door
3–5 hours
Frameless Door
4–6+ hours
Complex installations may take longer.
How to Maintain Shower Doors After Installation
Proper care extends lifespan.
Wipe After Use
Use a microfiber cloth or squeegee.
Clean Weekly
Use gentle glass-safe cleaners.
Check Hardware
Inspect screws and hinges.
Prevent Hard Water Buildup
Dry glass after each shower.
Keep Tracks Clean
Remove debris and soap residue.
Regular maintenance keeps doors looking polished.
Signs Your Shower Door Needs Adjustment
After installation, watch for:
- Leaking corners
- Door dragging
- Uneven gaps
- Loose handle
- Hard sliding
- Misaligned closure
Address issues quickly.
When Professional Installation Makes Sense
A professional may help if:
- Glass is oversized
- Bathroom walls are uneven
- Custom doors are needed
- Frameless heavy panels are used
- Waterproof sealing is difficult
Experts like M&N Frameless Shower Doors LLC can assist when advanced installation or custom fitting is needed.
Final Thoughts
Installing shower doors can transform a bathroom and improve both function and appearance. With proper measuring, careful alignment, secure hardware installation, and reliable sealing, homeowners can create a safe and polished shower enclosure.
Whether you are installing sliding, framed, pivot, or hinged shower doors, patience and accuracy are essential. Following the correct steps helps prevent leaks, protects glass panels, and ensures a long-lasting fit.
FAQs
1. Can I install shower doors by myself?
Yes, many standard shower doors can be installed by homeowners with proper tools and accurate measuring.
2. How long does it take to install shower doors?
Most installations take between 2 to 6 hours depending on door style and complexity.
3. Do shower doors need silicone sealant?
Yes, silicone helps seal joints and prevent leaks.
4. What is the hardest part of installing shower doors?
Accurate measuring and proper alignment are usually the most challenging steps.
5. Can shower doors be installed on tile walls?
Yes, but drilling must be done carefully to avoid cracking tiles


